Transforming Video to Article with GPT-4o
/ 20 min read
Introduction
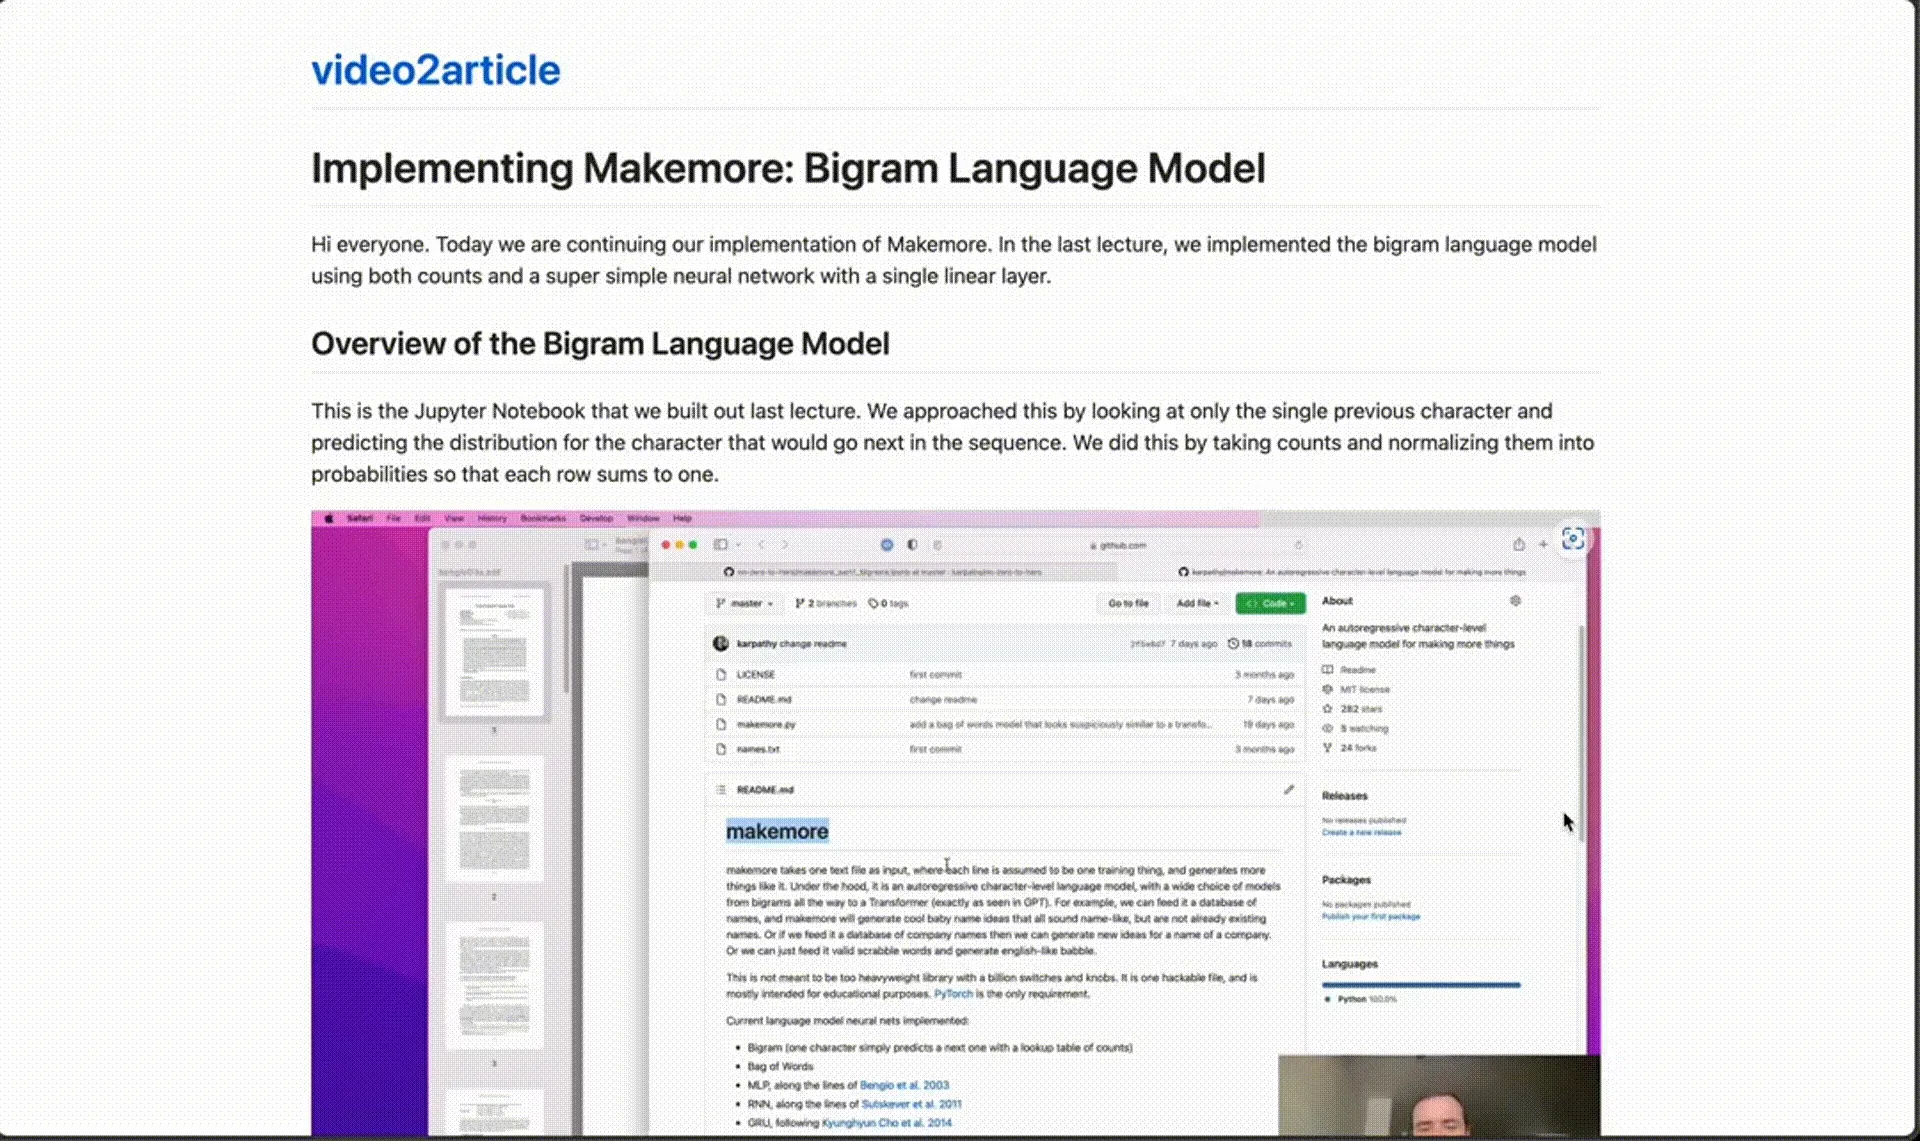
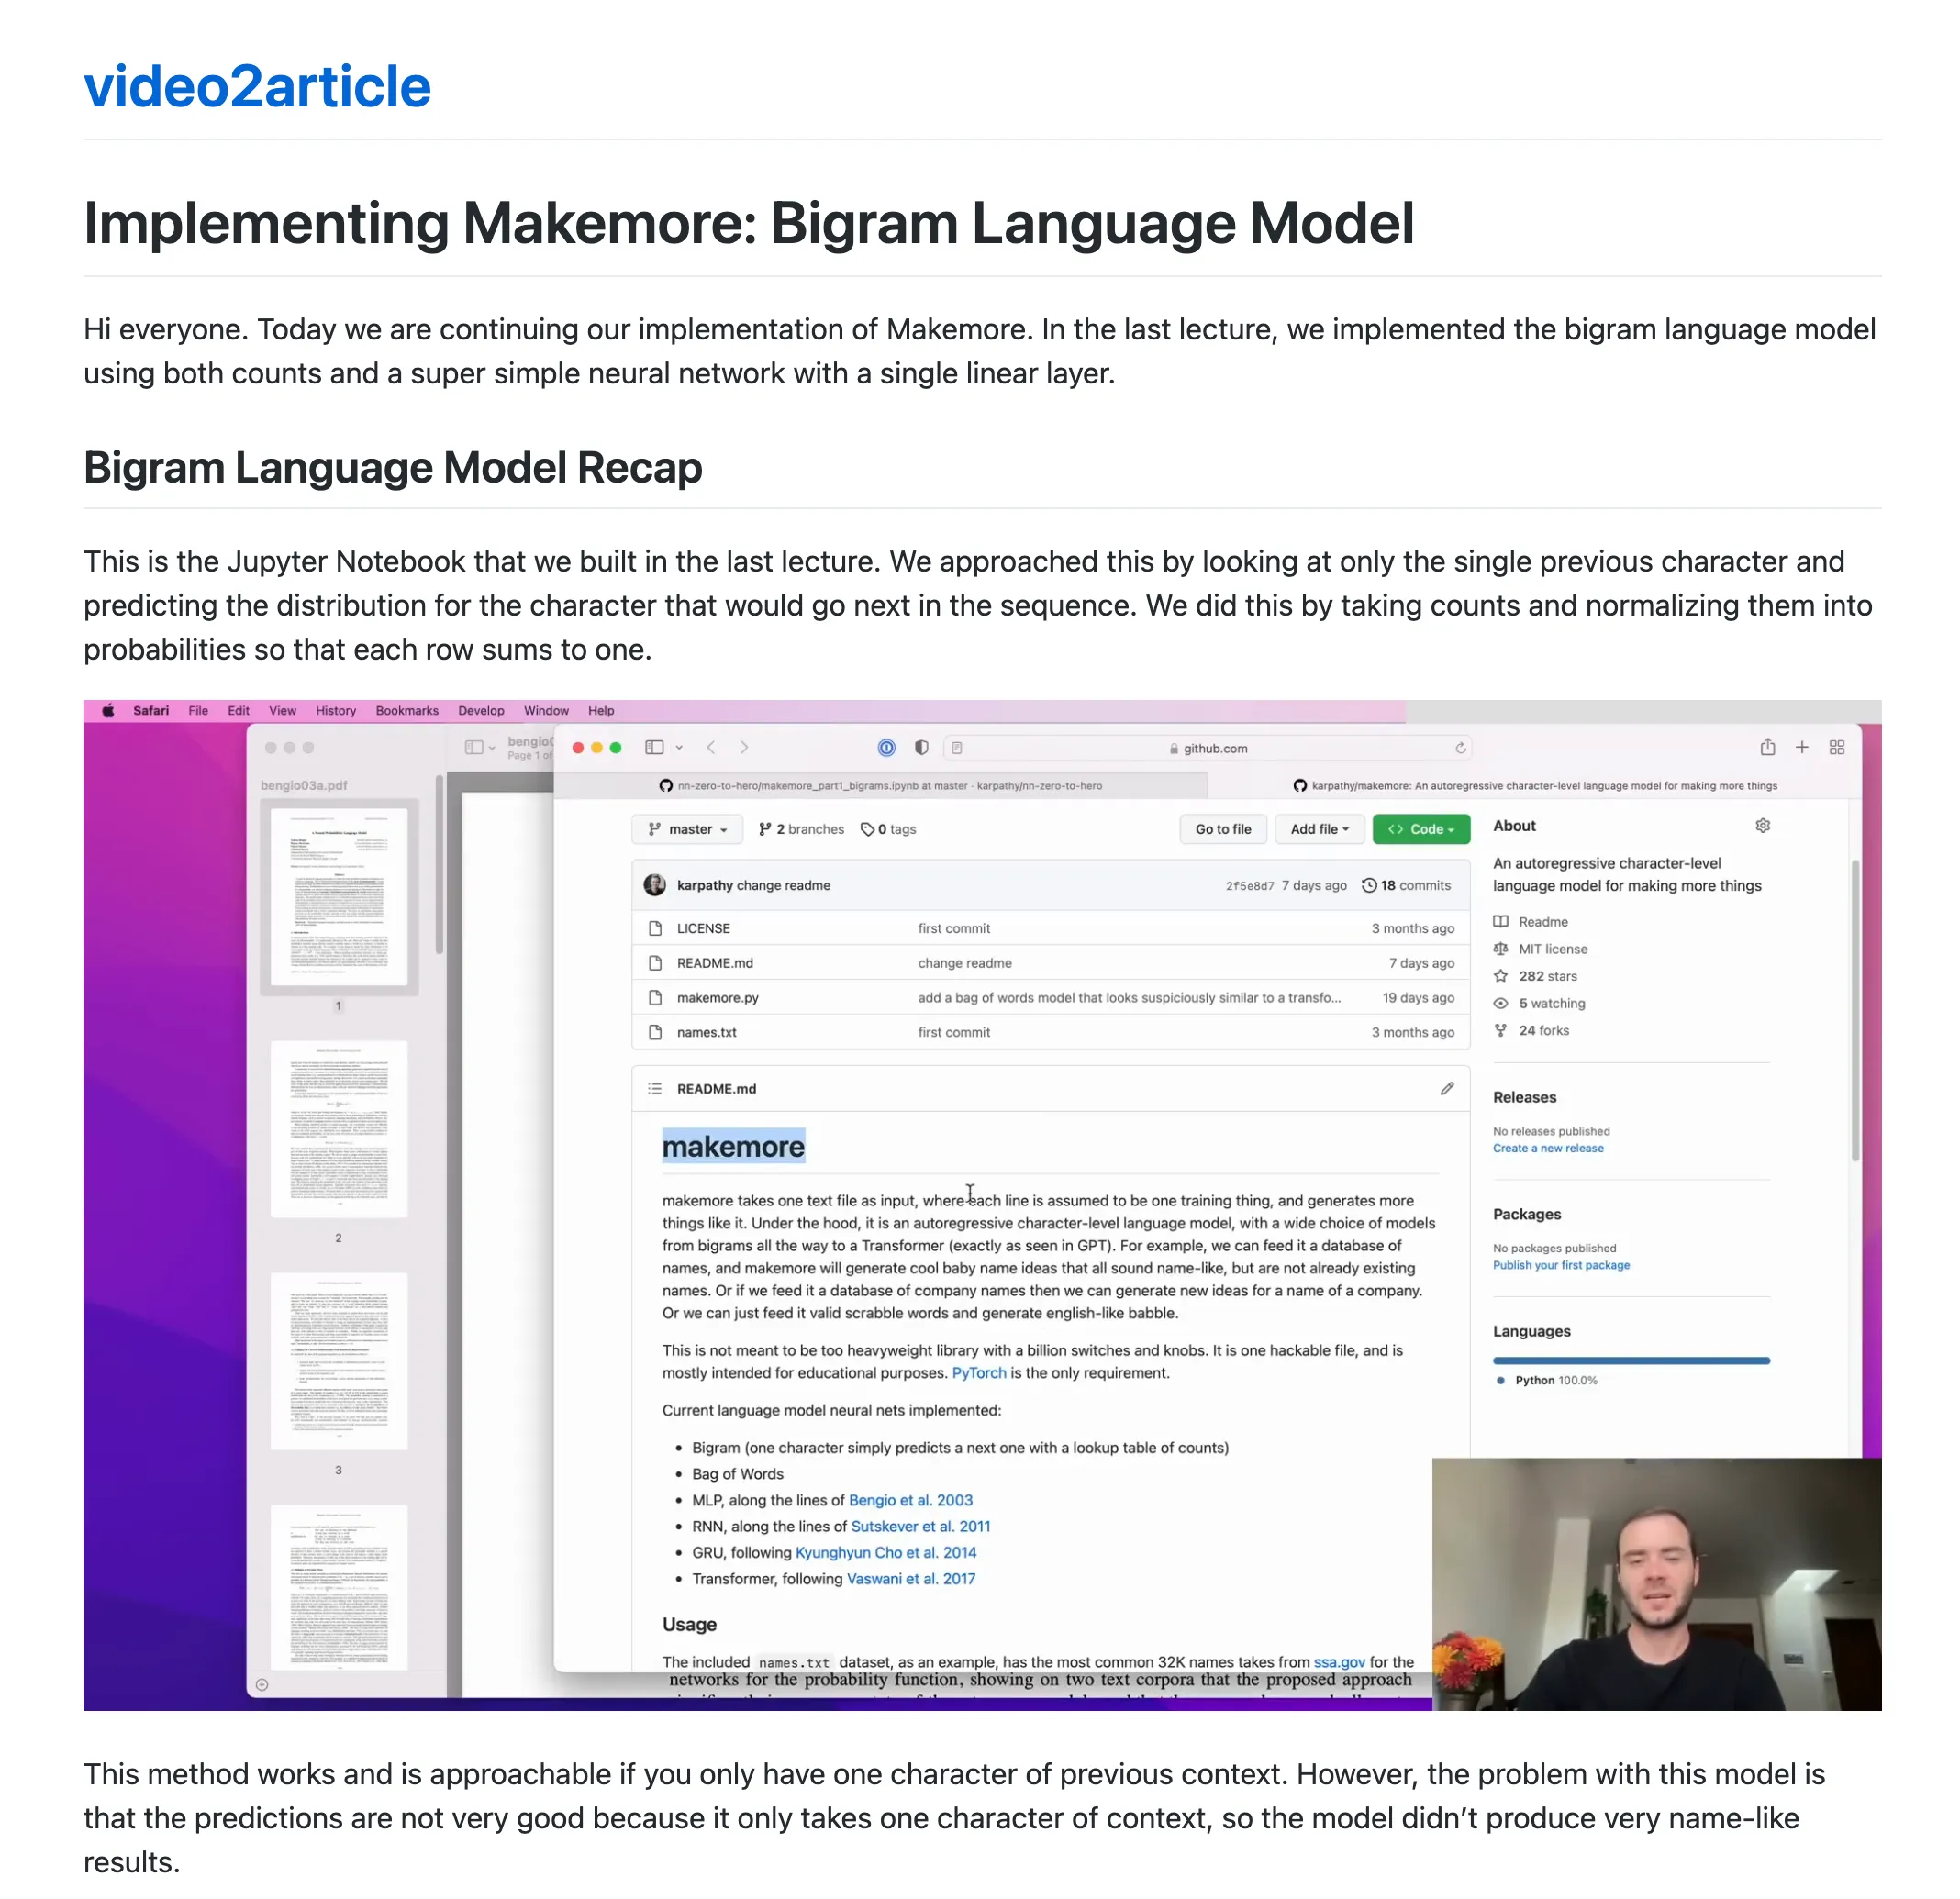
Recently, while I was getting hands-on with Andrej Kaparthy’s newest video tutorial on building GPT-2 124M model from scratch, I happened to stumble upon the following post on X:
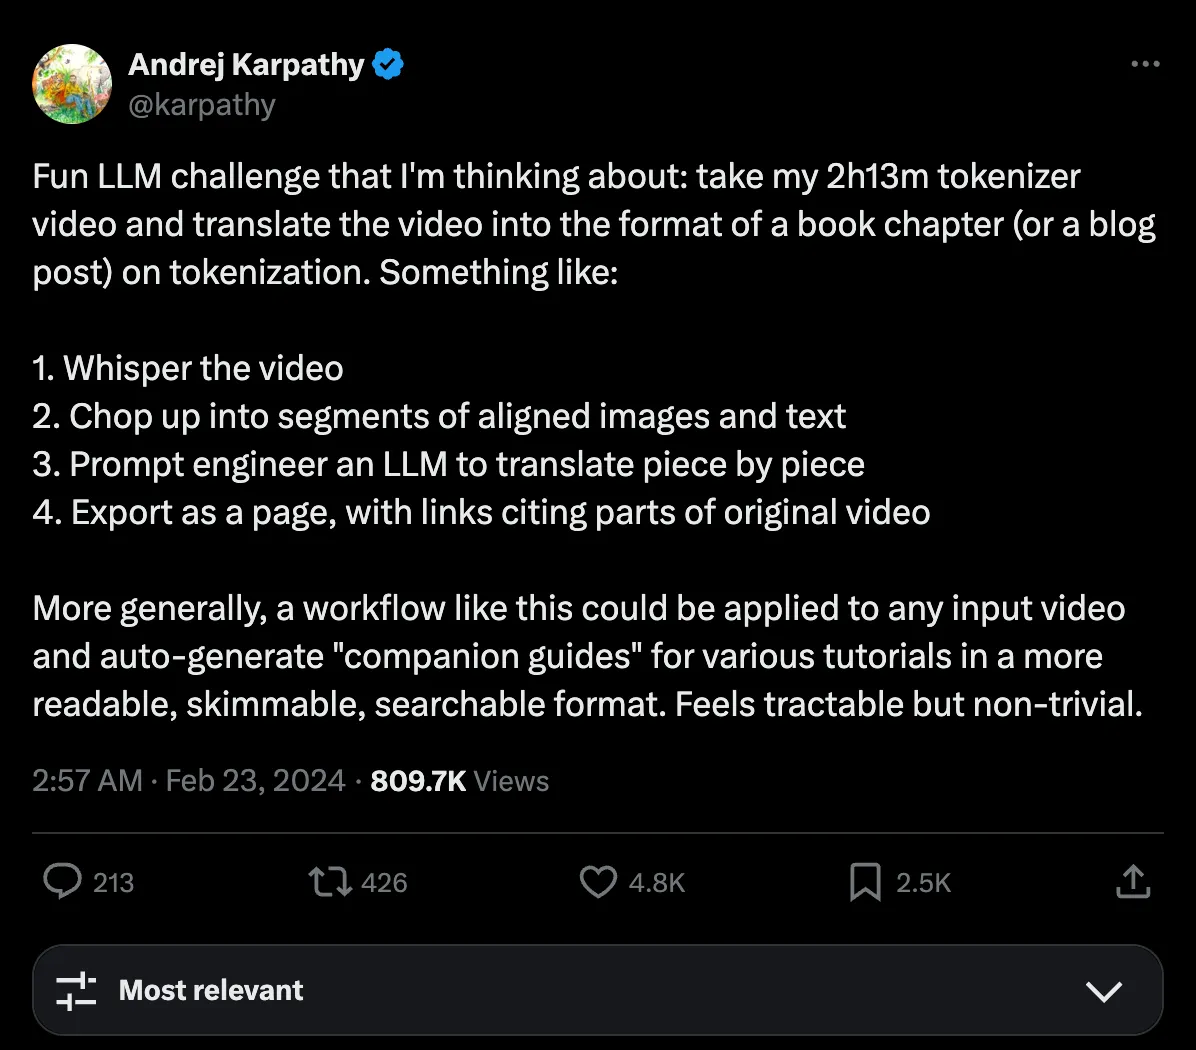
This piqued my interest in whether the latest Large Multimodal Models (LMM) suffice in achieving the said task. I have seen plenty of articles and tutorials attempting to condense information from lengthy research papers into a digestible format in the form of summarisation with LLM. However, condensing or converting video tutorials into easily readable technical blog post format remains a novel area I have yet to explore.
Hence, I conducted my research and stumbled upon several attempts to transform video tutorials into a corresponding blog post. The first one by Emmanuel Ameisen and his colleagues from Anthropic leverages Anthropic’s best LMM to date – the Claude 3 Opus to tackle the challenge:
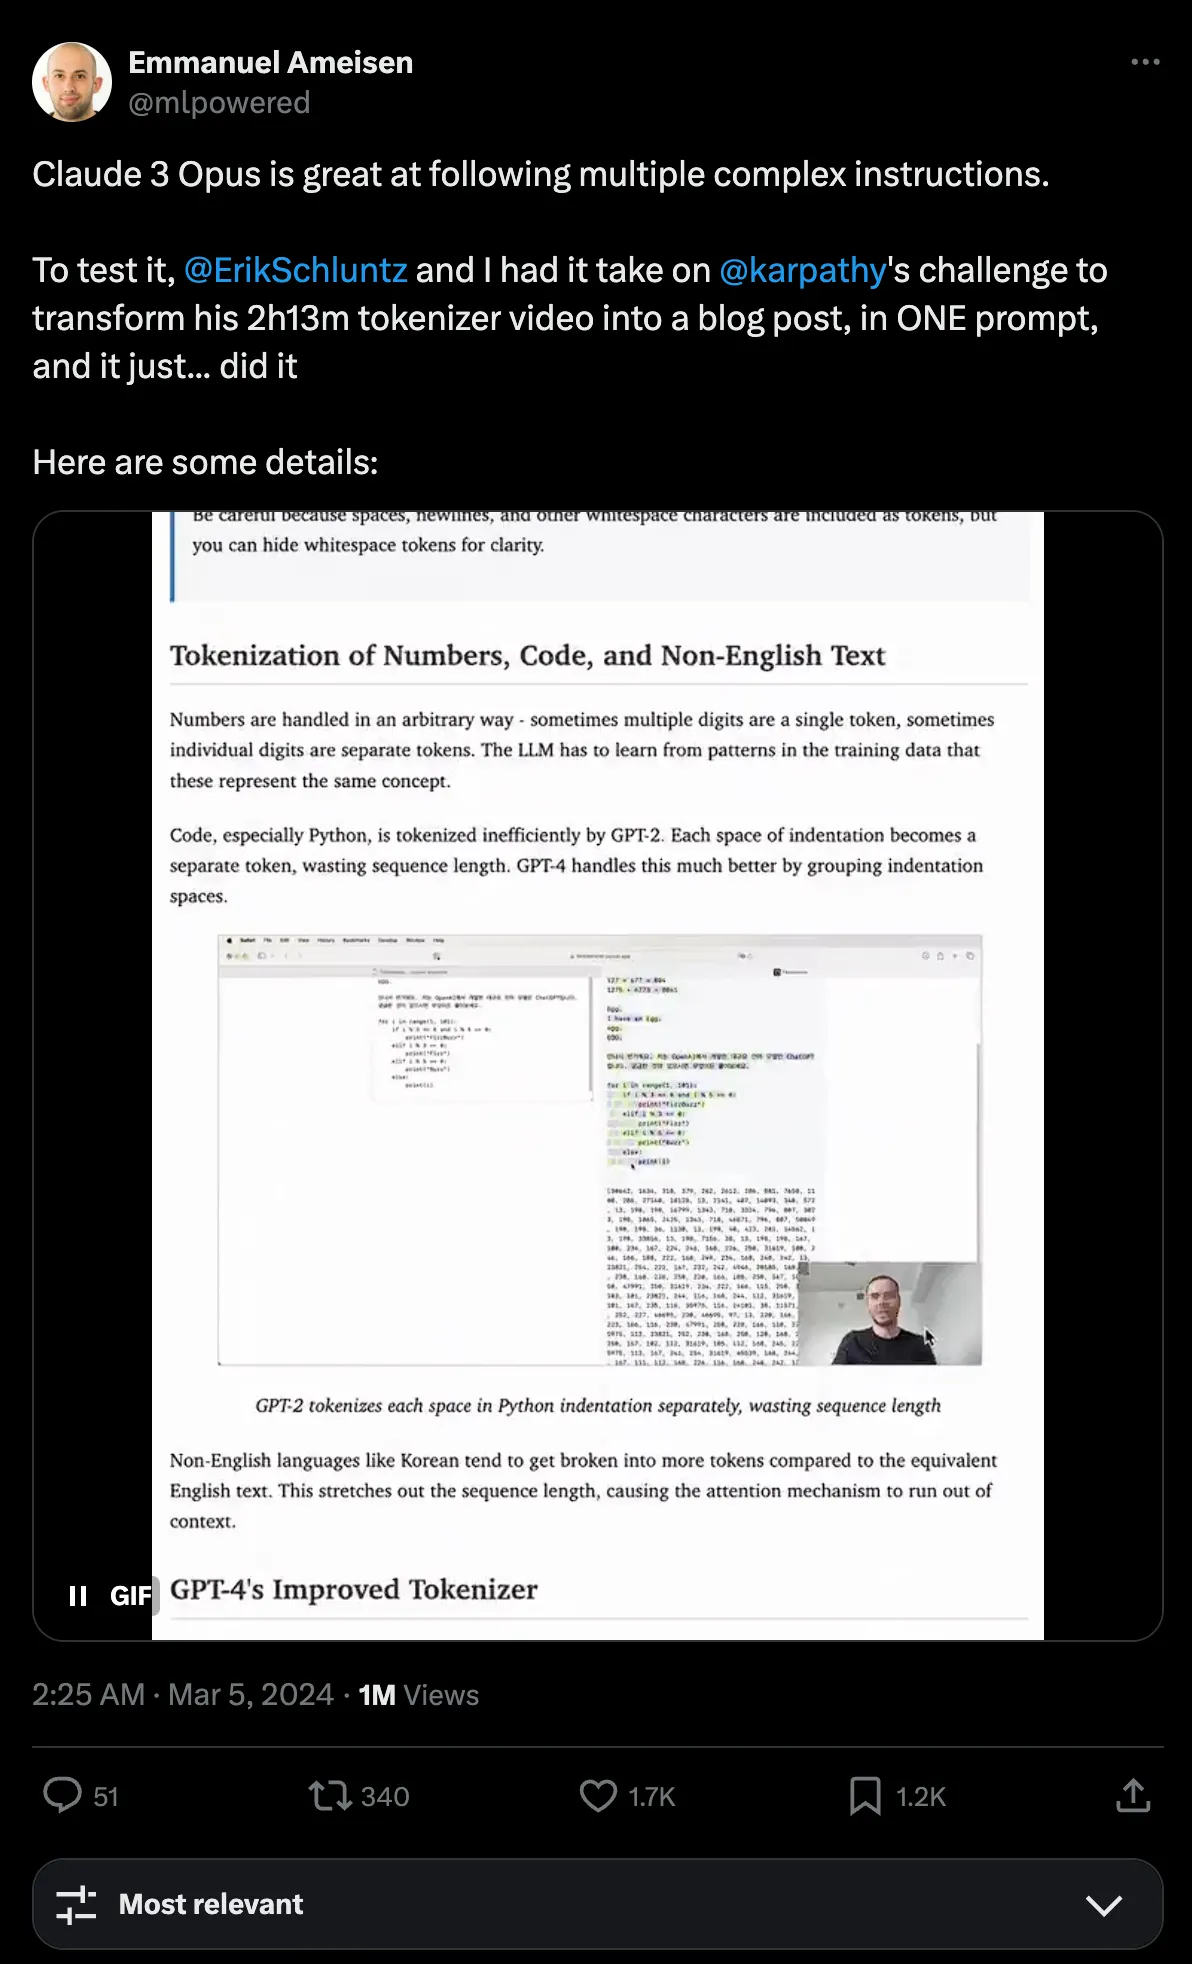
Their attempt was described as simply prompting Claude 3 to complete the task with a well-crafted prompt. While further details of the attempt were discussed on X, it did not provide much insight into reproducing the setup.
Some Attempts on YouTube to Article
Using Claude 3 to Transform a Video Tutorial Into a Blog Post
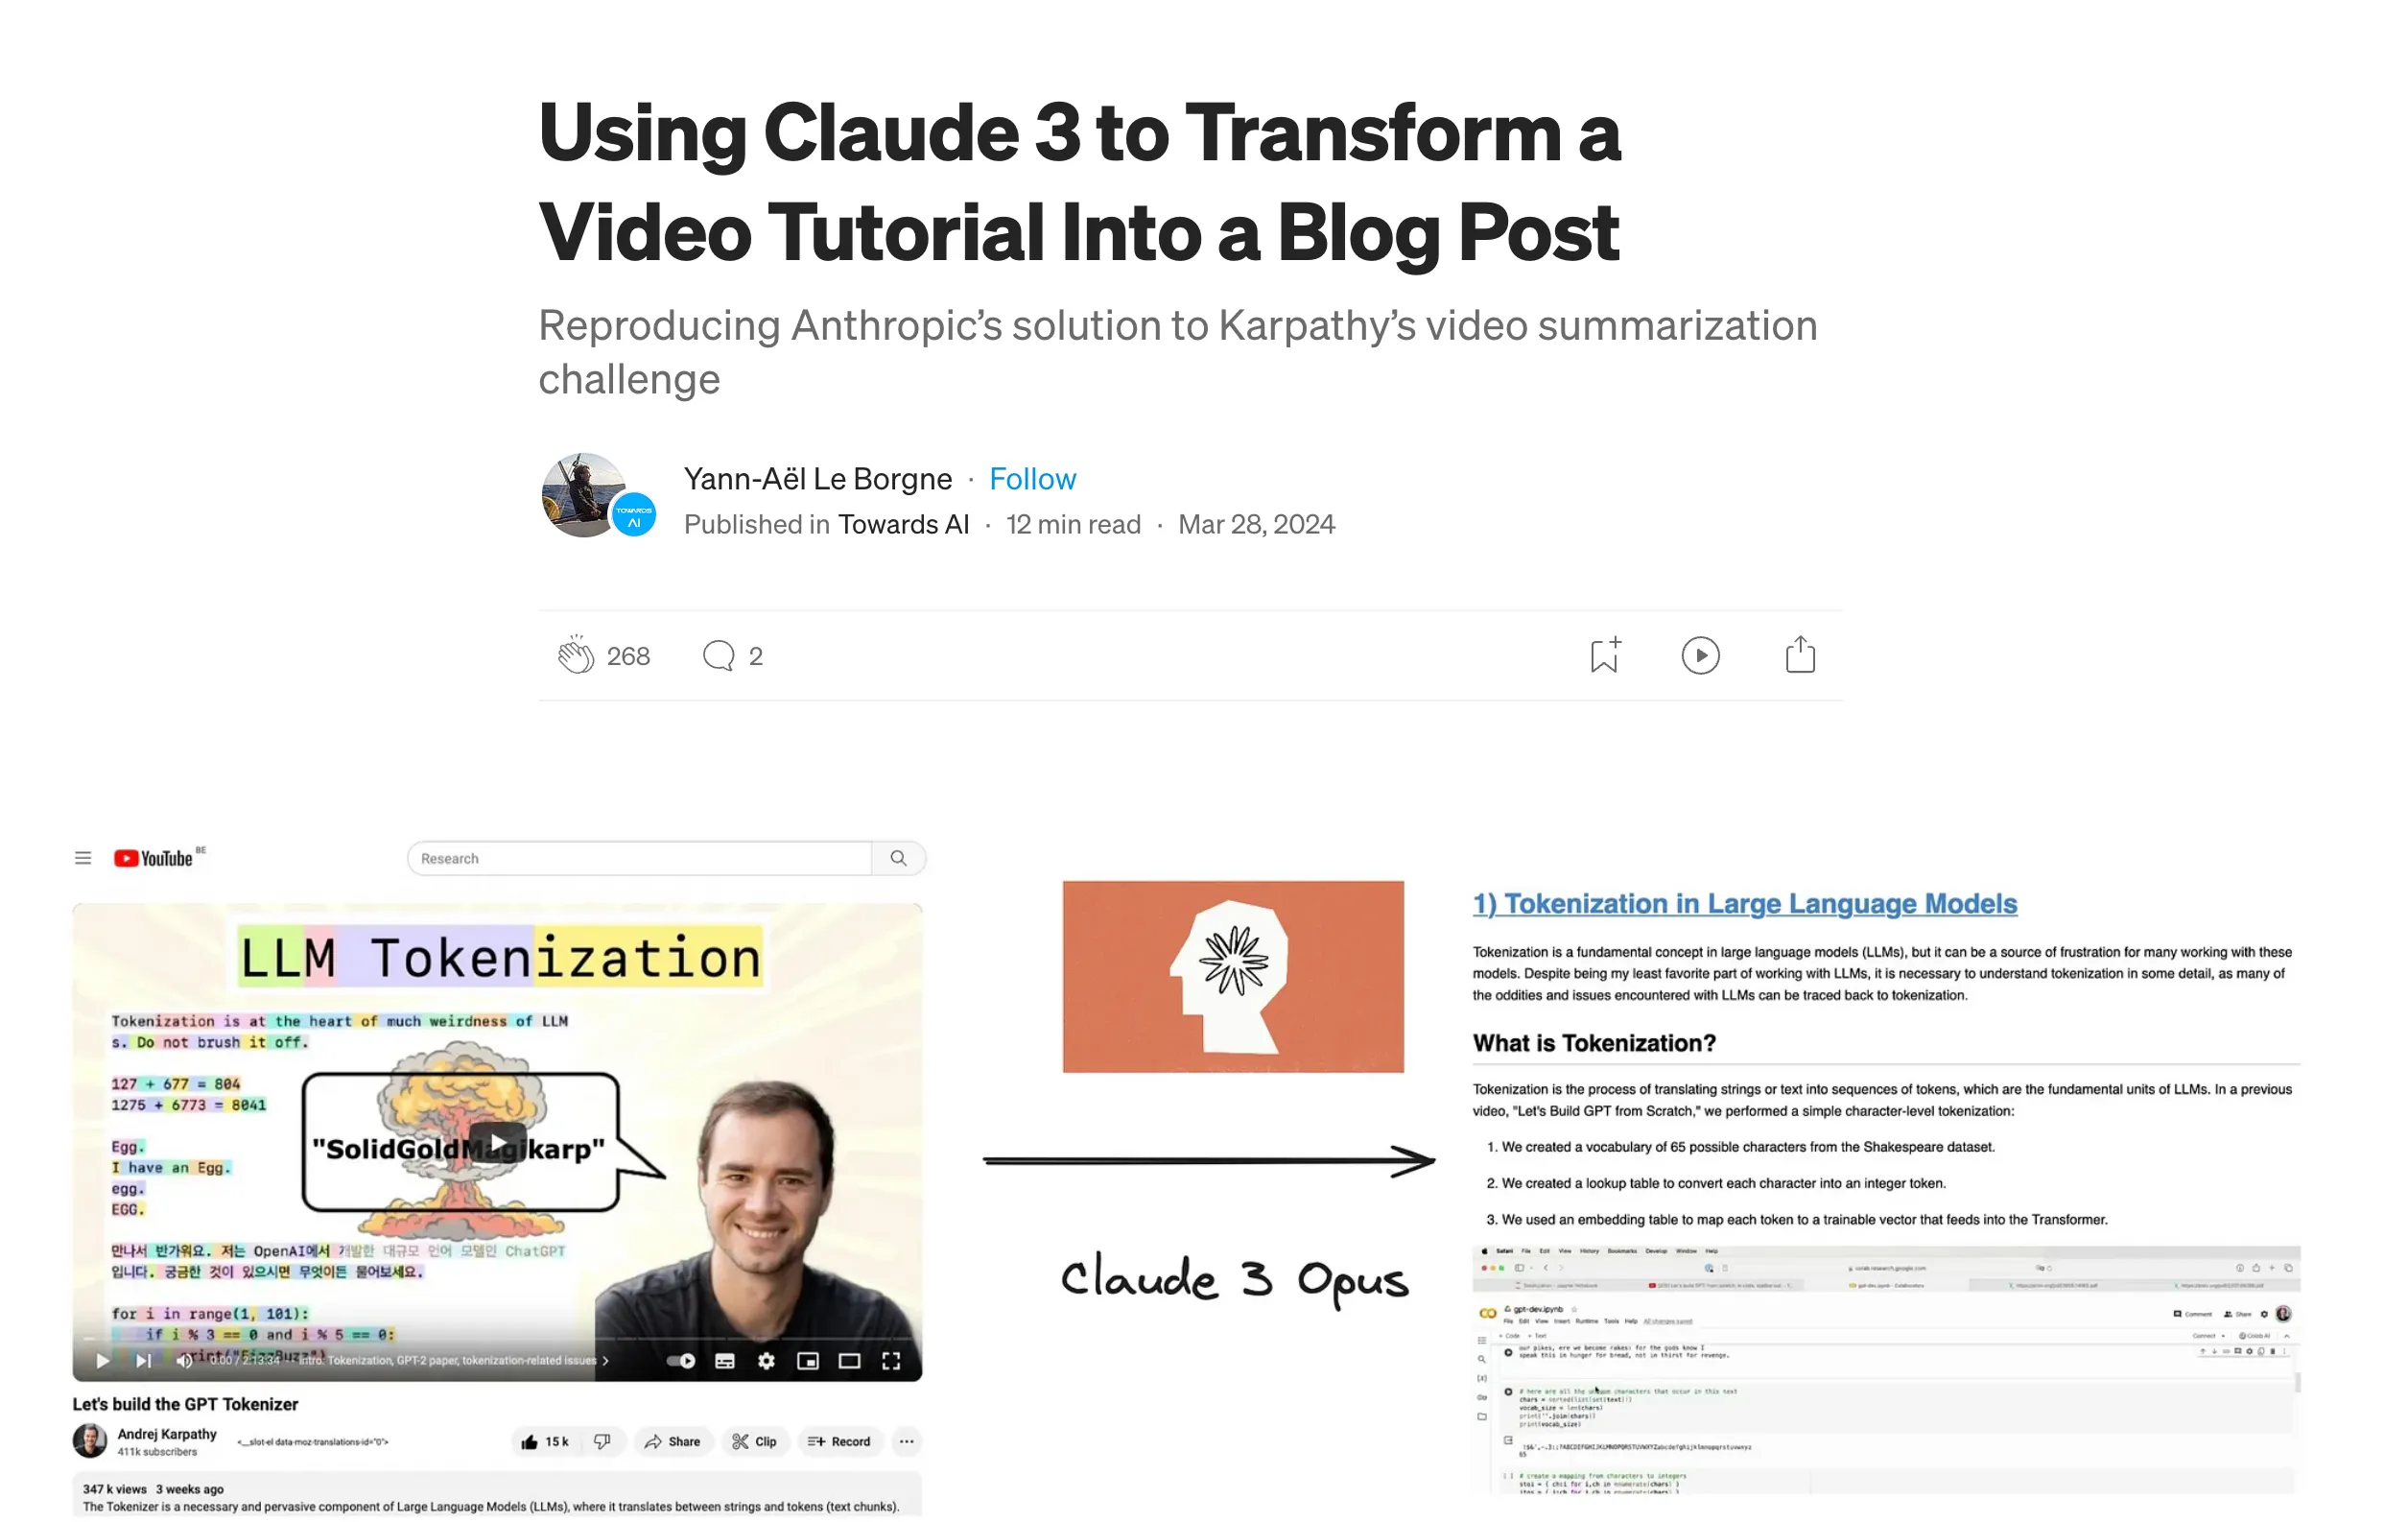
However, Yann-Aël Le Borgne on his Medium article, attempted in replicating the process – with additional complexity from what is initially anticipated.
From Yann-Aël Le Borgne’s exploration, there were several key insights:
- The two main constraints in tackling the challenge were the limited number of images that can be sent in a request and the number of pages that the LMM can handle and generate.
- To circumvent existing constraints, the video should be split into sizeable chapters (or chunks) processed chapter-wise, and combined at the end for the final output.
- Costs can be relatively expensive compared to other traditional LLM use tasks, especially in the case of a long video, where an estimation of the exploration may cost $5-10. Hence, there should be optimization strategies involved especially for the screenshot selection process (as the recommendation was to select 10-15 images per chapter of a few minutes).
Without diving too deep into his implementation, the workflow can be summarised as:
- Downloading video, generating or retrieving existing transcript (from YouTube directly).
- Chunking videos into relevant and logical chapters (manually) and selecting video frames per chapter.
- Using LMM to process each chapter individually with the chapter’s transcript and video frames.
- Combining contents from all chapters to obtain the final output.
For further details, you can check out the full article by Yann-Aël Le Borgne.
Solving Karpathy LLM Challenge
In another attempt to tackle Karpathy’s challenge – Misbah Syed used a more structured approach with LangChain with GPT-4 Vision. While not discussed in detail, it can be assumed that the approach likely involves several chains that build upon each other to achieve a structured flow of generating the eventual article.
In Misbah Syed’s workflow, the following is implemented:
- Downloading video and generating transcript with Whisper (w/ timestamp).
- Extract frames from the video and select a subset of frames based on the Structural Similarity Index Measure (SSIM). Frames are further classified to determine if the frame is useful.
- Combining transcript, frame, and image URL (images are stored online to be embedded as image links for displaying).
- Generate an article with an article generator
- The final article is further processed to add the Table-of-Content (TOC).
Unlike Yann’s documentation, it was relatively unclear if the article generation was done similarly in chunks or not. However, assuming the initial constraints highlighted earlier, given the video was about ~2 hours long, we can assume that the chunking approach was also adopted and combined at the end for the final article output.
For further details, you can check out the article by Misbah Syed.
By summarising these previous attempts, we can highlight common areas in each implementation and areas of consideration to factor when building a similar LLM application from scratch.
Implementing Video2Article from Scratch with GPT-4o
Before I dive into the specifics, feel free to take a look at the companion repository and generated article.
Some Initial Consideration
Learning from prior attempts, the following were identified as key points to consider to achieve similar results in my implementation:
- Video should be chunked in reasonable and logical chapters, either manually or programmatically (w or w/o LLM). Each chunk segment should ideally be of a decent length – perhaps minimally > 1-2 minutes to prevent too many segments when dealing with a long video such as Karpathy’s building makemore or GPT tokenizer.
- Frame selection is key. We cannot afford to send too many images per chapter segment and should optimize for only the most relevant frames (no duplication or similar frames).
- Embedding images as part of the article can be tricky as we need to figure out how to allow the LMM to pinpoint the right image name/URL to use when embedding the image within the markdown article.
In addition, having an automated feedback and revision step within the article generation process can also be considered to reduce the number of initial errors in formatting that may need to be corrected post-generation.
A high level overview of Video2Article is illustrated as such:

video2article workflow.Retrieving Video and Transcript
For downloading video, libraries such as PyTube and yt-dlp works perfectly. Using yt-dlp, I downloaded the video from YouTube in 1080p with the following command:
yt-dlp -f "bestvideo[ext=mp4][height<=1080]+bestaudio[ext=m4a]/best[ext=mp4]/best" -o video.mp4 "<video-url>"Similarly, you can download via Python with the following function:
def download_video(url: str, output_dir: str):    """Download video given URL.
    Args:        url (str): Video URL.        output_dir (str): Output directory for video.    """
    ydl_opts = {        "format": "bestvideo[ext=mp4][vcodec^=avc][height<=1080]+bestaudio[ext=m4a]/best[ext=mp4][height<=1080]/best",        "outtmpl": f"{output_dir}/video.%(ext)s",        "logger": logger,    }
    ydl = yt_dlp.YoutubeDL(ydl_opts)    try:        logger.info(f"Downloading video from: {url}")        ydl.download([url])    except Exception as e:        logger.error(f"Failed to download video from: {url}")        raise (e)
    logger.info(f"Video downloaded to: {output_dir}")
Besides the video required to generate the video frames, we must also retrieve the corresponding transcript. There are two ways to approach this. Firstly, like in Yann’s approach, you can use a library such as youtube-transcript-api and extract transcript as follows:
from youtube_transcript_api import YouTubeTranscriptApi
transcript = YouTubeTranscriptApi.get_transcript(youtube_video_id)
Alternatively, the second approach uses an Automatic Speech Recognition (ASR) model such as OpenAI’s Whisper to generate the required transcript. In my case, I used the whisper.cpp to create a transcript locally using my MacBook Pro M2 Max. Specifically, I used the small.en model considering we are generating an hour of the transcript.
To generate the transcript, the following commands can be followed:
# extracting .wav audio from video firstffmpeg -i "video.mp4" -vn -acodec pcm_s16le -ar 16000 -ac 2 "audio.wav"
# cd into whisper.cppcd whisper.cpp# generate binary and download small.en modelmake small.en# generate transcript from video downloaded./main -m ./whisper.cpp/models/ggml-small.en.bin -f audio.wav -osrt -of subs -p 8 -l "auto"
The -osrt flag indicates that we are generating the transcript in SRT format which I find it easier to work with in the subsequent stages when handling with matching specific transcript chunks for each segment. An example of the generated full transcript can be found here.
Chunking Transcript Into Thematic Segments
With the transcript generated, the next step is to chunk the transcript into segments, where each segment is indicated with its start and end timestamp signifying the boundary of each segment without overlapping with other segments. This provides distinct sets of transcript content per segment attempting to capture different thematic discussions or conversations.
In earlier attempts, Yann indicated his process of manually copying annotated chapters from YouTube into a list of dictionaries with information such as starting and ending timestamps. Although the method is manual, it ensures acceptable segments from the get-go. However, it is not viable if chapters are not annotated on YouTube.
To better automate such workflow, although at a cost (monetarily), I utilized GPT-4o to help determine the logical segments with the following prompt in a chat completion call:
def generate_md_section(client: OpenAI, transcript: str, b64_imgs: List[str]) -> str:    """Chat completion call to generate markdown content.
    Args:        client (OpenAI): OpenAI Client.        transcript (str): Transcript content.        b64_imgs (List[str]): List of base64-encoded frames.
    Returns:        str: Generated content.    """
    PROMPT = f"""    Task Instructions:    You have been provided with images of a video captured at various timestamps and a corresponding <transcript> generated by an AI speech recognition tool which may contain errors. Your task is to transform this transcript into a markdown-formatted blog post following these guidelines:
    1. Markdown Formatting: Ensure the output is in valid markdown format.    2. Structure and Headings: Insert appropriate section headings and apply formatting typical of a blog post or textbook. Do not include introductory or concluding paragraphs.    3. Image Selection and Insertion:        - Selection Criteria: Choose 1-3 key images that best illustrate and are most relevant to the discussed topics. Prefer images that show complete information, such as code snapshots or architecture diagrams.        - Alignment: **IMPORTANT** Make sure that the images you include align with the surrounding text content to ensure context relevance.        - Insertion Syntax: Use the following HTML tag to insert images: <img src="hh_mm_ss.jpg"/>, where hh_mm_ss corresponds to the timestamp located at the top left of the image        - Add line break after each image inserted.        - Do not attach two images consecutively without intervening text. Ensure that each image is followed by relevant text to maintain readability.    4. Content Editing:        - Rewrite any noisy or unclear parts of the transcript.        - Remove verbal tics and redundant information, mentioning each piece only once.        - Maintain the conversational style of the original transcript.        - Transcribe important code snippets and other valuable text when relevant.    5. Layout and Style:        - Use styling that aligns with typical blog or textbook presentations, including text, code, and callouts.        - Do not add extraneous details not mentioned in the transcript or depicted in the images.    6. Review Before Responding:        - Before finalizing your response, review your work to ensure that all guidelines have been followed accurately.        - Check for grammatical errors, adherence to markdown syntax, correct image timestamps, and overall coherence in the narrative.
    Note:    1. Do not create a separate conclusion or summary section.    2. Exclude markdown code block snippets (e.g., markdown).
    <transcript>    {transcript}    </transcript>    """
    messages = [        {            "role": "system",            "content": "you are an expert with keen eyes in identify timestamps and writing technical blogpost.",        },        {            "role": "user",            "content": [*map(lambda x: {"image": x, "resize": 768}, b64_imgs), PROMPT],        },    ]
    params = {"model": "gpt-4o", "messages": messages, "temperature": 0}    response = client.chat.completions.create(**params)    content = response.choices[0].message.content  # type: ignore
    return content
However, one issue is that the current prompt tends to return the segments chunk within json code block snippet. As such, a simple logic was added to check for fenced code block syntax and remove it.
An example segment generated with the above prompt can be seen as follows:
[ { "start": "00:00:00,000", "end": "00:01:07,520", "header": "Introduction and Review of Previous Lecture" }, { "start": "00:01:07,520", "end": "00:02:25,720", "header": "Challenges with Bigram Model and Introduction to Multilayer Perceptron Model" }, { "start": "00:02:25,720", "end": "00:06:05,360", "header": "Overview and High-Level Description of the Bengio et al. Paper (2003)" }, { "start": "00:06:05,360", "end": "00:06:05,680", "header": "Multilayer Perceptron Model Implementation Steps" }, ...]At first glance, each segment’s topics are acceptable, and clear why the segment was chosen. However, in some cases, a very short segment may be chosen like the one below:
{ "start": "00:06:05,360", "end": "00:06:05,680", "header": "Multilayer Perceptron Model Implementation Steps"}However, in subsequent stages, you would realize as there may not be any transcript content associated with such a short segment duration, the segment may be dropped without affecting the article generation process. Nevertheless, for an initial development iteration, this automated process of transcript chunking helps reduce the manual work involved in converting a video to an article.
Processing Video Frames
To turn our video into inputs for LMM like GPT-4o, we need to extract images/frames from the video. However, it is not a straightforward task of simply generating frames without much consideration. To better illustrate, the concept of frames per second (FPS) is the frequency at which consecutive images are captured and displayed. For an hour-long video, using 24 FPS, we will extract a total of 24 * 3,600 = 86,400 frames.
If we ignore the limitations of the number of image inputs per request as highlighted in earlier section and used all 86,400 frames, the estimated token usage will be at 86,400 * 1105 tokens per image (if we resize to 768px), which equals to a whooping 95,472,000 tokens. This meant that we would incur a cost of ~$477 dollars to process images for an hour-long video.
While the numbers presented above are estimated based on a rather absurd scenario, the point is that we cannot afford to utilize every single frame. We do not need every single frame as well. Considering most video tutorials, the content shown on screen is rather static (e.g., showing code, etc.). Hence, one approach is to capture frames at every N number of seconds. In my case, I decided to capture 1 frame every 10 seconds.
Without diving too deep into specifics at this stage, I also generated two sets of frames (both at 1 frame per 10 seconds) but instead, one set of frames had the timestamp of the particular frame embedded at the top left corner.

These sets of frames are used specifically for our content generation process with GPT-4o. Meanwhile, the “clean” frames are used when processing the generated content. If you are curious about the specifics of how I used these two sets of frames, you can jump directly to the content generation process.
To generate the two sets of frames, I make use of the ffmpeg-python library:
def extract_ss_frames(input_dir: str, output_dir: str):    """Extract screenshot frames from video with ffmpeg.
    Args:        input_dir (str): Input directory of video.        output_dir (str): Output directory for video frames.    """
    directories = [f"{output_dir}/labelled", f"{output_dir}/unlabelled"]    for directory in directories:        if not os.path.exists(directory):            os.makedirs(directory)            logger.info(f"Directory created: {directory}")        else:            logger.info(f"Directory already exists: {directory}")
    labelled_cmd = [        "ffmpeg",        "-i",        f"{input_dir}/video.mp4",        "-vf",        r"fps=1/10,drawtext=text='%{pts\:gmtime\:0\:%H\\\:%M\\\:%S}':x=10:y=10:fontcolor=white:fontsize=96:box=1:boxcolor=black@1.0",        "-vsync",        "vfr",        f"{output_dir}/labelled/frame_%04d.png",    ]    unlabelled_cmd = [        "ffmpeg",        "-i",        f"{input_dir}/video.mp4",        "-vf",        "fps=1/10",        "-vsync",        "vfr",        f"{output_dir}/unlabelled/frame_%04d.png",    ]    try:        _ = subprocess.run(            labelled_cmd,            stdout=subprocess.PIPE,            stderr=subprocess.PIPE,            text=True,            check=True,        )        _ = subprocess.run(            unlabelled_cmd,            stdout=subprocess.PIPE,            stderr=subprocess.PIPE,            text=True,            check=True,        )    except subprocess.CalledProcessError as e:        logger.error(f"Error extracting frames: {e.stderr}")        raise (e)
Selecting Video Frames: The Naive vs Semantic Way
Skipping the nitty-gritty details of matching segments with their corresponding transcript content (if you are interested, you can find the implementation here), we move on to look into matching frames to segments.
Considering that we already have taken pre-emptive measures to work within the minimum number of frames, our number of frames per segment has been reduced drastically. However, in practical scenarios, video tutorial tends to be static as mentioned previously. This meant that each frame even when taken apart in N seconds, may still be relatively similar (except for minor differences such as scrolling, adding new lines of code, etc).
Building on Misbah’s idea of using SSIM to evaluate frames, I utilized semantic-router by Aurelio AI to do the job. Semantic-router for image chunking uses vision transformers (ViT) to extract features from frames and compare them. Semantically different frames will be in separate chunks, leaving us with groups of frames to work with. As such, for each segment, I chose the first frame in each chunk for the completion call to GPT-4o.
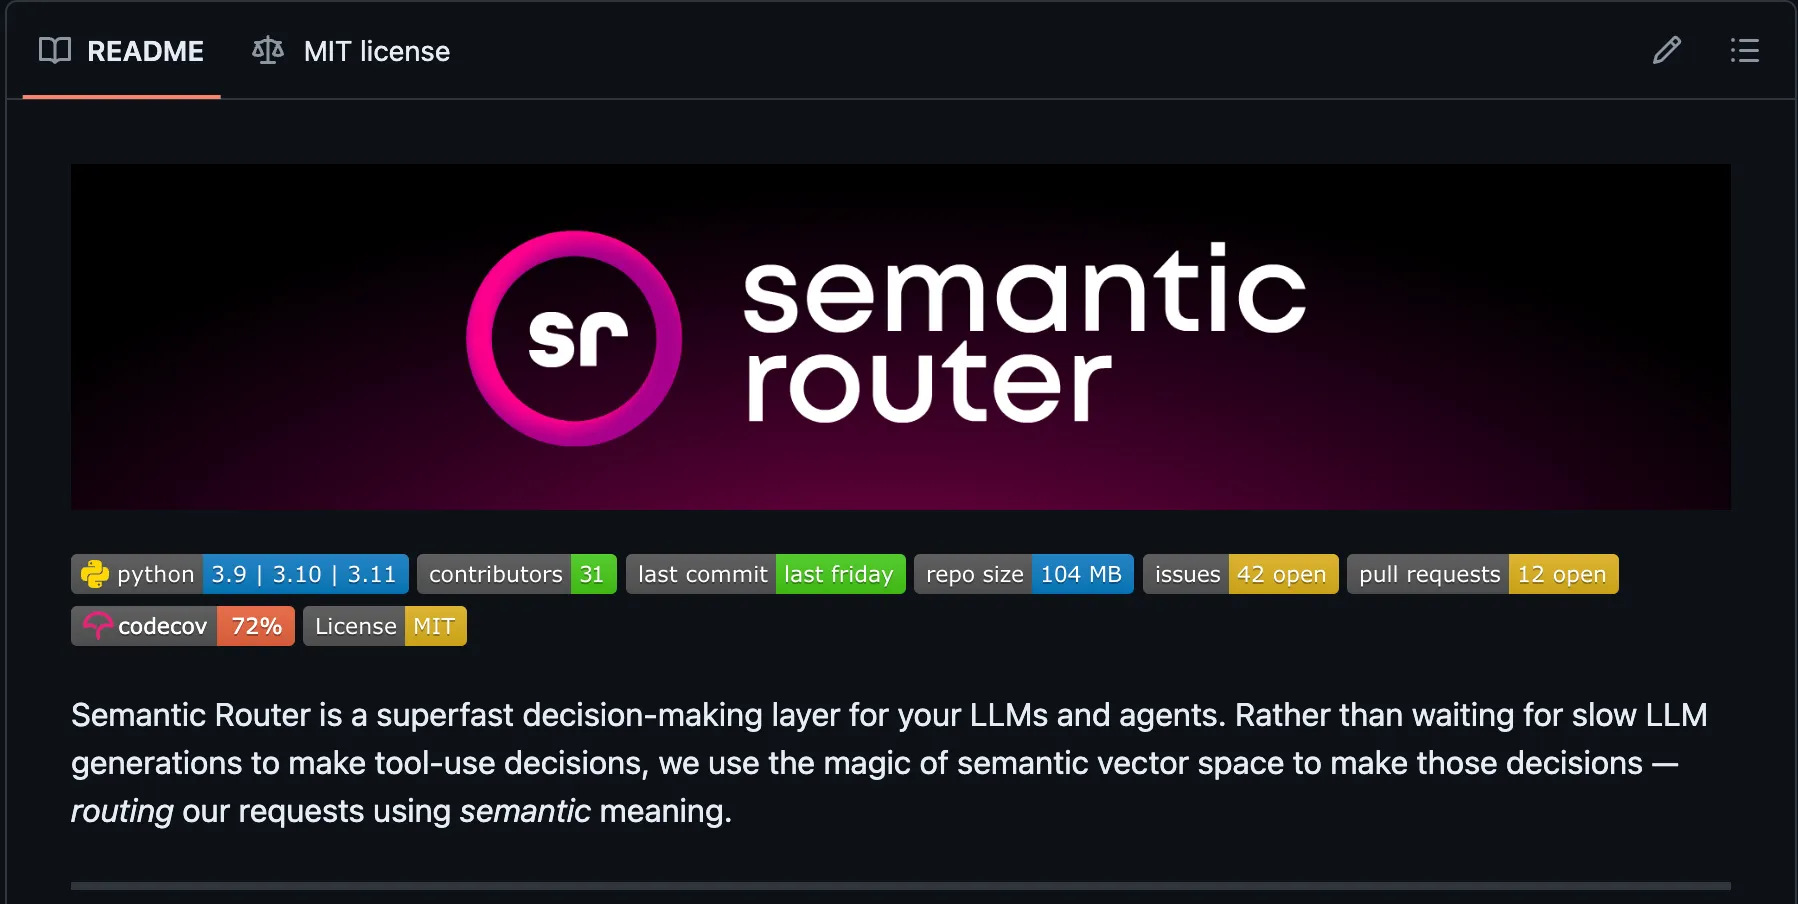
Aurelio AI’s Semantic Router.In my implementation, I have a total of 23 segments, where I only selected ~30-50 images in total as opposed to the initial ~400+ images extracted from Karpathy’s building makemore video. Alternatively, in a naïve approach to reduce the number of frames, we can set the maximum number of frames we would like to use per segment without considering the similarity between each frame.
The following illustrates the frame selection process at the segment level:
def semantic_chunker(image_frames: List[MatLike]) -> List[Chunk]:    """Chunker to chunk frames semantically with ViT.
    Args:        image_frames (List[MatLike]): List of frames.
    Returns:        List[Chunk]: List of frames in chunks.    """
    device = (        "mps"        if torch.backends.mps.is_available()        else "cuda" if torch.cuda.is_available() else "cpu"    )    logger.info(f"Using {device} for semantic chunking")    encoder = VitEncoder(device=device)    chunker = ConsecutiveChunker(encoder=encoder, score_threshold=0.95)    frames = list(map(Image.fromarray, image_frames))    chunks = chunker(docs=[frames])
    return chunks[0]

def retrieve_frames_by_segments(    segments: List[Dict], images: List[MatLike], semantic_chunking: bool) -> List[Dict]:    """Match frames to segment.
    There are two approach to matching frames:        1. The `semantic` way: Using semantic-chunker to match frames        based on features extracted with ViT        2. The `naive` way: Select frames in interval to ensure only max N        number of frames is selected.
    Args:        segments (List[Dict]): List of segments.        images (List[MatLike]): List of timestamped frames.        semantic_chunking (bool): Whether to use semantinc-chunker for frames selection.
    Returns:        List[Dict]: List of segments with selected frames.    """
    logger.info("Retrieving frames on segment-level")
    for idx, seg in enumerate(segments):        seg_imgs = []        start_second = timestamp_to_rounded_seconds(seg["start"])        end_second = timestamp_to_rounded_seconds(seg["end"])        for img_idx in range(start_second, min(end_second, len(images))):            seg_imgs.append(images[img_idx])        if semantic_chunking:            semantic_chunked_seg_imgs = []            # semantic chunking of image via ViTEncoder            chunks = semantic_chunker(seg_imgs)            for chunk in chunks:                semantic_chunked_seg_imgs.append(chunk.splits[0])            seg_imgs = semantic_chunked_seg_imgs        # only retrieve ~10-15 images per segment        # act as another round of filter        interval = (end_second - start_second) // 10        seg_imgs = seg_imgs[:: interval if interval else 1]        seg["images"] = seg_imgs        logger.info(f"{len(seg_imgs)} retrieved for segment: {idx+1}")    return segments
Generating Segment-level Content with GPT-4o
Moving on to the most exciting part of generating article content – where we make use of our previous pre-processing to iteratively produce content for each segment.
Encoding Images as Inputs
To send images to GPT-4o, you will first need to encode images into base64 string:
def convert_images_to_base64(images: List[Union[MatLike, np.ndarray]]) -> List[str]:    """Convert frames to base64 string.
    Args:        images (List[Union[MatLike, np.ndarray]]): List of images.
    Returns:        List[str]: List of base64-encoded frames.    """
    b64_imgs = []    for im in images:        # handle semantic chunker which requires nd.array setup        if isinstance(im, Image.Image):            buffer = io.BytesIO()            im.save(buffer, format="JPEG")            buffer = buffer.getvalue()        else:            _, buffer = cv2.imencode(".jpg", im)        b64_imgs.append(base64.b64encode(buffer).decode("utf-8"))  # type: ignore    return b64_imgs
This aligns with OpenAI’s cookbook example on handling images with GPT’s visual capabilities.
Making Completion Calls
To generate the actual content, the following prompt is used:
Task Instructions:You have been provided with images of a video captured at various timestamps and a corresponding <transcript> generated by an AI speech recognition tool which may contain errors. Your task is to transform this transcript into a markdown-formatted blog post following these guidelines:
1. Markdown Formatting: Ensure the output is in valid markdown format.2. Structure and Headings: Insert appropriate section headings and apply formatting typical of a blog post or textbook. Do not include introductory or concluding paragraphs.3. Image Selection and Insertion:    - Selection Criteria: Choose 1-3 key images that best illustrate and are most relevant to the discussed topics. Prefer images that show complete information, such as code snapshots or architecture diagrams.    - Alignment: **IMPORTANT** Make sure that the images you include align with the surrounding text content to ensure context relevance.    - Insertion Syntax: Use the following HTML tag to insert images: <img src="hh_mm_ss.jpg"/>, where hh_mm_ss corresponds to the timestamp located at the top left of the image    - Add line break after each image inserted.    - Do not attach two images consecutively without intervening text. Ensure that each image is followed by relevant text to maintain readability.4. Content Editing:    - Rewrite any noisy or unclear parts of the transcript.    - Remove verbal tics and redundant information, mentioning each piece only once.    - Maintain the conversational style of the original transcript.    - Transcribe important code snippets and other valuable text when relevant.5. Layout and Style:    - Use styling that aligns with typical blog or textbook presentations, including text, code, and callouts.    - Do not add extraneous details not mentioned in the transcript or depicted in the images.6. Review Before Responding:    - Before finalizing your response, review your work to ensure that all guidelines have been followed accurately.    - Check for grammatical errors, adherence to markdown syntax, correct image timestamps, and overall coherence in the narrative.
Note:1. Do not create a separate conclusion or summary section.2. Exclude markdown code block snippets (e.g., markdown).
<transcript>{transcript}</transcript>
If you find the prompt similar, you are right. The prompt is based on Emmanuel and co’s original prompt with Claude 3 Opus. However to make sure that it works well with GPT-4o, the prompt is further refined by sending an edited prompt through GPT-4o as part of a feedback loop so that we can guide the AI to better understand our requirements.
The prompt, if you had missed out – contains an instruction that relates to why we initially generated two sets of frames, except the set we are sending to GPT-4o has timestamps within the image:
3. Image Selection and Insertion: ... - Insertion Syntax: Use the following HTML tag to insert images: <img src="hh_mm_ss.jpg"/>, where hh_mm_ss corresponds to the timestamp located at the top left of the imageWe explicitly instructed the model to insert images in Markdown image syntax, where the image URL is the timestamp identified from the input images it receives and has chosen during content generation. In the subsequent step, we can ensure that the information from the inserted image URL can be replaced by the “clean” frame given the placeholder URL.
This code implementation below stems from Yann-Aël’s approach to adding additional information to the inserted images:
def link_target_ss(content: str) -> str:    """Match actual frames to placeholder image url in content.
    Args:        content (str): Raw conten generated by LLM/LMM.
    Returns:        str: Edited content.    """
    pattern = r'<img\s+src=["\'](\d{2}_\d{2}_\d{2})\.jpg["\']'    img_tags = re.findall(pattern, content, re.IGNORECASE)
    for tag in img_tags:        hh, mm, ss = map(int, tag.split("_"))        # +1 to as frames start from frame_0001, frame_0002        # 00:00:00 -> frame_0001        target = (((hh * 3600) + (mm * 60) + ss) // 10) + 1        content = content.replace(            f"{tag}.jpg", f"./frames/unlabelled/frame_0{target:03}.png"        )
    return content
Post-Processing Generated Content
While the content generated by GPT-4o is generally well-formatted based on the prompt above, there are some instances where formatting issues still occur.
The following steps for further processing are done:
-
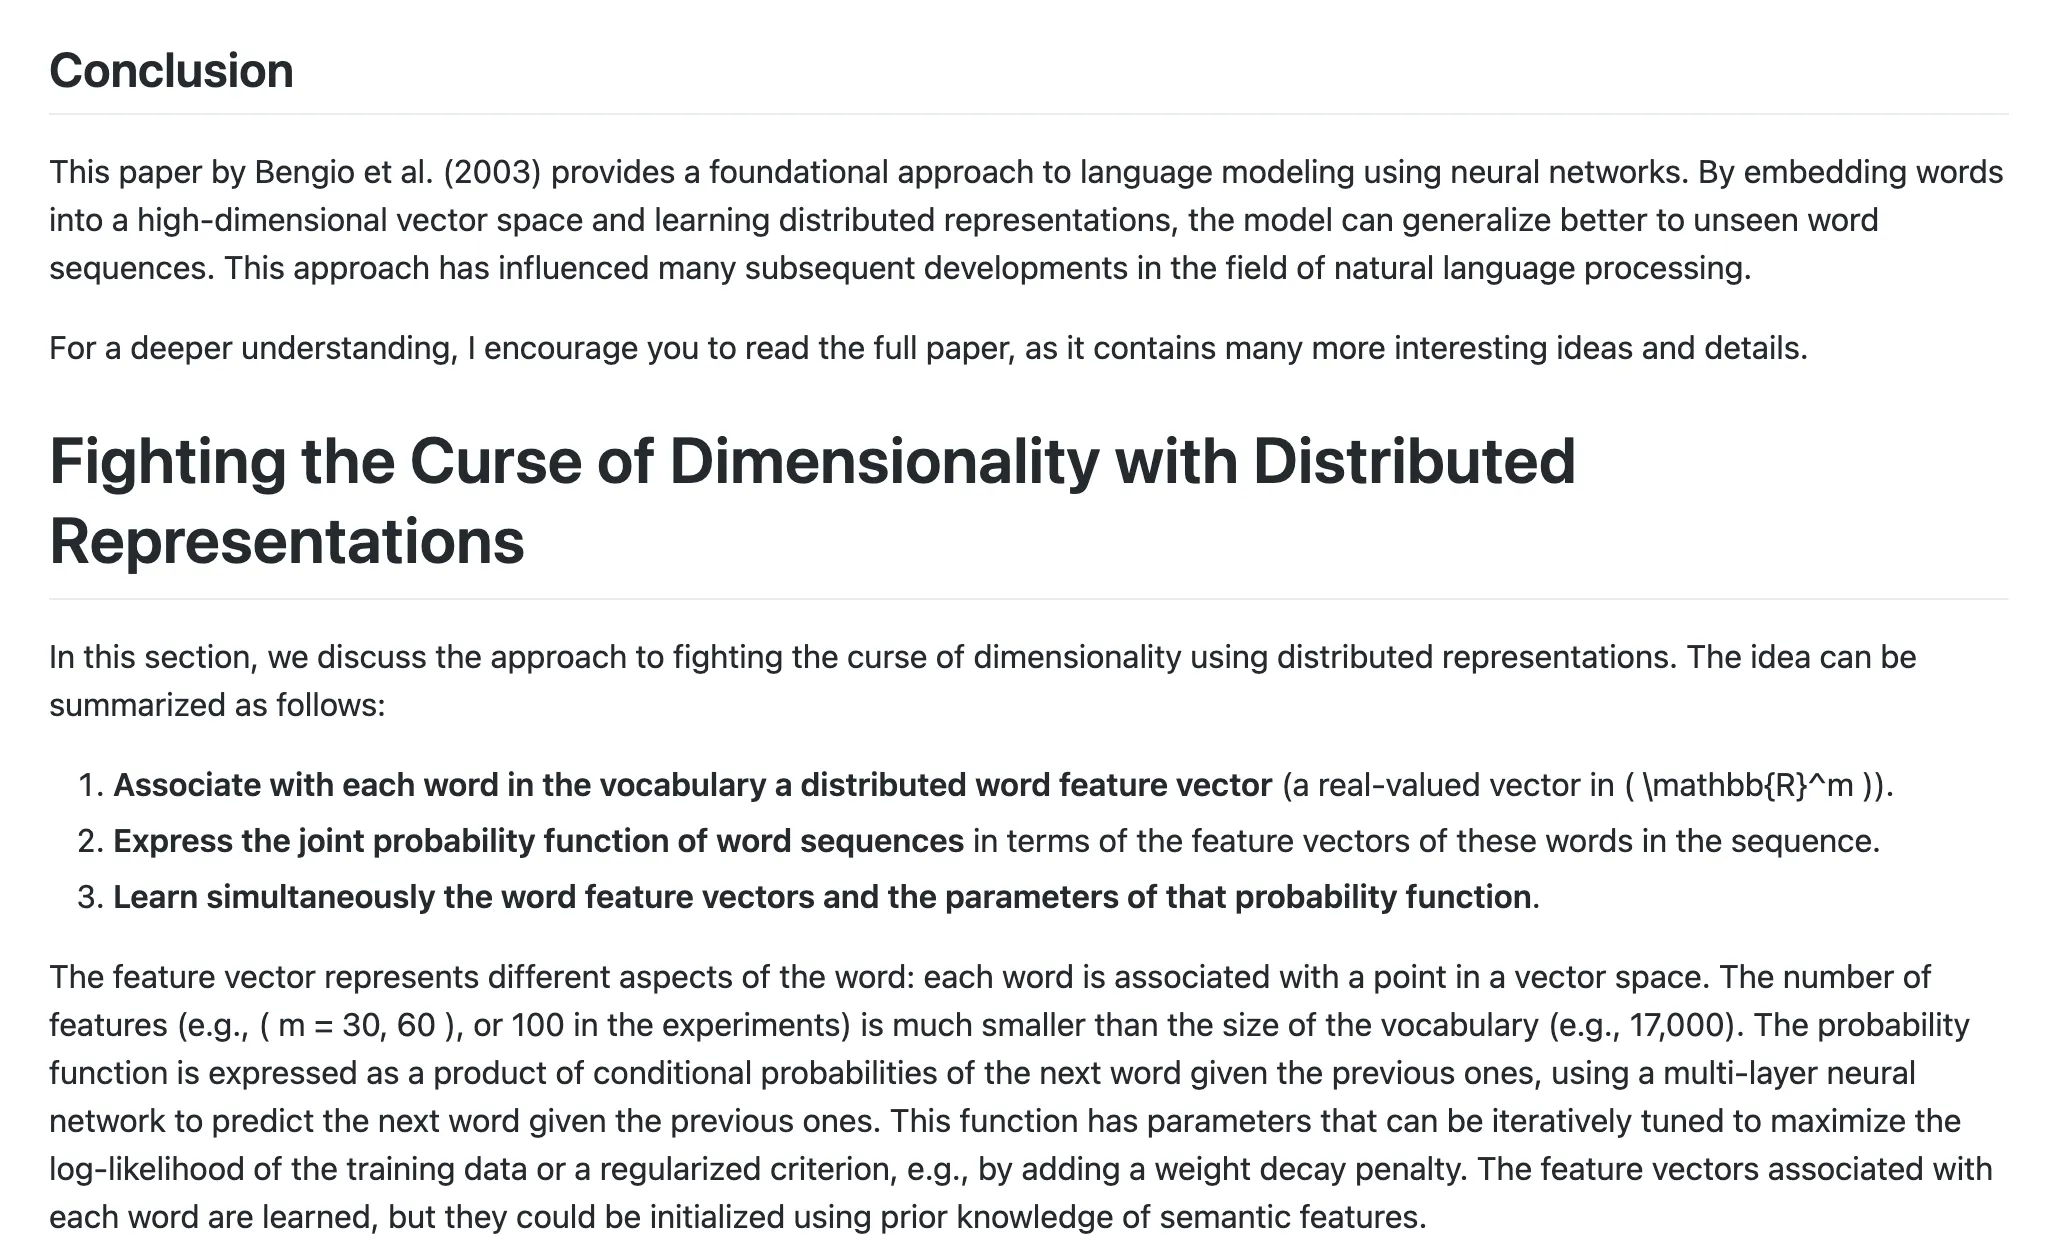
As we generate content on the segment level, each content may appear to the model as an individual “article”, resulting in output with additional section headers such as Conclusion or Summary. While the content under such section headers is generally meaningful, the inclusion of such section headers disrupts the flow of the resulting article. Hence, we remove such section by going through a pre-defined list of unwanted headers.
-
As part of the initial consideration of having a proofreading and formatting process, we send the generated content back to GPT-4o for refinement.
Generating Resulting Article
With every segment’s content generated, all we need to do is combine all content and write it into a Markdown file.
logger.info("Generating final markdown")final_content = "\n".join(section_contents)with open("index.md", "w", encoding="utf-8") as f: f.write(final_content)The final output from the implementation of Video2Article can be viewed here.
Conclusion
There you have it! We have gone through the specifics of creating a simple LMM application to turn a video tutorial into an actual article. The final result captures the essence of the original video, similar to what Emmanuel, Yann, and Misbah had achieved with their implementation.
However, we do still notice areas of inconsistencies in the content and formatting (despite the attempt to refine via additional completion call).
In addition, you would also find that images may also be inserted in areas several texts away from the actual code snippet, resulting in misalignment of content at times.
Other areas of concern also aligned with what the previous attempt summarised such as complexity in prompt engineering (crafting a good prompt to direct the generation of content), irreproducibility, and cost associated with running such a process with LMM.
That being said, we still have a lot of room to improve for video2article in areas such as more detailed segmenting, and better selection of images (perhaps in a manual way so that we only select relevant images). This attempt to tackle Karpathy’s LLM challenge demonstrates the potential of using the large multimodal model in more aspects of our daily lives to enhance the process of acquiring more knowledge! Meanwhile, stay hungry, and looking forward to sharing more interesting things we can build with such large models!